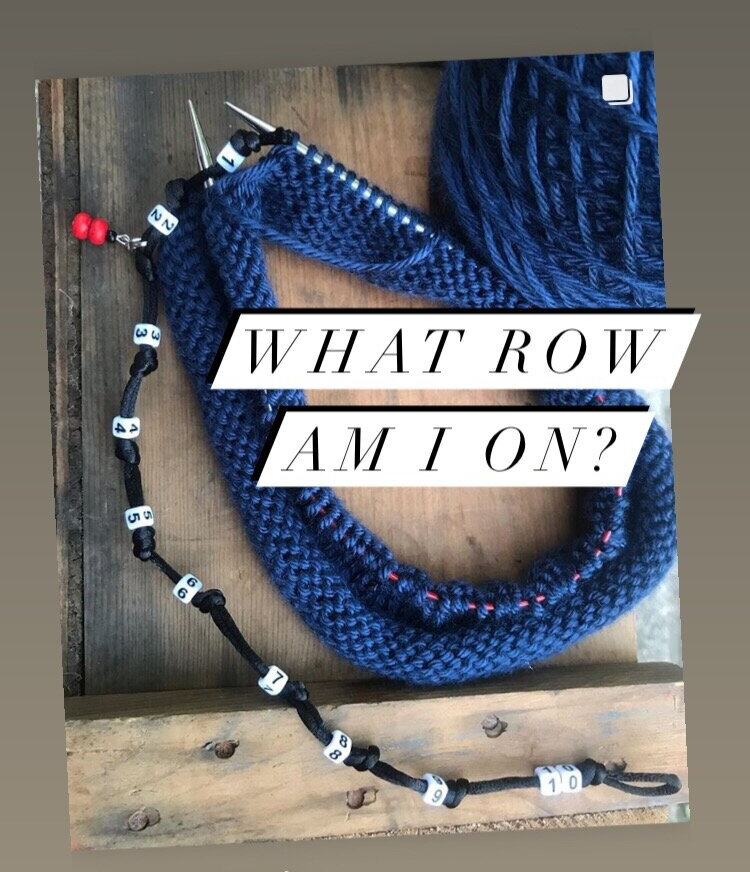
DIY ROW COUNTER
If you are a knitter chances are you know the frustration of losing track of what row you are in your row/round count. One of my favorite hats to make has over 80 rounds so if I didn’t keep track of my place in the pattern I wasted a lot of time counting and recounting rounds.
So I did what I always do…I went to Pinterest in search of a solution. Specifically, I was looking for a way to count my rows that would stay with the project from start to finish. Many of my patterns come with worksheets that you can mark your rounds off with pen/pencil but I am not always near a writing surface when I’m knitting. I needed something portable and hands free. Etsy has some very pretty row counters that I could have made with jewelry making supplies. I happen to have a lot of those things since my daughter is a jewelry designer, but I would have had to buy the rings and I was concerned that the yarn might catch on the metal.
I ended up using this 2mm cord with some number beads I ordered off of Amazon.
The other reason I prefer the cord style is that the number bead and the needle go in the same space between knots. With the jump ring style it takes more effort to quickly identify which row you are on.
Want to make your own? Here’s how:
Gather the following supplies:
1) 52 inches of Cord of some sort (Anything that splits easily or doesn’t hold it’s shape will get tangled in your yarn and will slow you down.) I used 2mm cord, but am on the hunt for a 1mm to see if it’s firm enough.
2) Number beads 0,1,1,2,3,4,5,6,7,8,9
3) Scissors
4) Ruler or measuring tape
5) Lobster claw with a charm. You could use a safety pin, crochet stitch marker…Be creative!
INSTRUCTIONS:
1) Fold your cord in half
2) Tie a knot at the two cut ends (see how to form the knot in the photo with the #1 bead )
3) At the fold is where you will add the #1 bead
4) Slide the bead to the other end where the first knot will keep it from coming off
5) Tie another knot to create the 1st stitch space but don’t pull it tight quite yet
6) Insert the largest needle you’d ever use with your row counter into the gap between the two knots & the bead to figure out the minimum spacing you need between knots. NOW you can pull your knot tight.
7) Repeat steps 4,5,6 until the last two beads which will make the #10
8) Add a lobster claw clasped charm at #1
Pardon my messy nail polish…when your 9 year old offers a spa day you don’t turn it down - even if she picks a color I usually reserve for my toes. :)
HOW TO USE YOUR NEW ROW COUNTER:
Note: For rows 1-10 you can ignore the lobster claw charm.
Your row counter doubles as a stitch marker, but you have to pay attention when you slide the marker over or you will defeat the purpose of keeping track of what number you are on.
1) If you are knitting in the round follow the example on the left and leave the #6 on the left needle while you add the #7 to the right needle.
2) Slip the marker off the left needle and continue knitting the row/round
3) The counter functions better if you fold it in half and keep it in front of your work for knit stitches
4) The number beads count the 1’s column and red charm counts the 10’s column. For example: The photo below has the needle at the 4th bead and the charm at the 1st. That means I’m on row 14.
5) Here’s another example: The needle by the 7th bead and the red charm by the 4th bead translates to round 47.
6) When the needle gets to the 10th bead it is time to move the charm up one number.
That’s all there is to it! Simple, consistent, and always with my projects. To learn more tips and tricks I’ve picked up along my maker journey follow me on Instagram here. You will want to follow along because I am going to be giving a row counter away as part of my 1K GIVEAWAY coming up later this month.


